
How we turned a white van into our home in 2 weeks at -20C in a Home Depot parking lot
In early 2017 we bought a van. And not just any van, this van was to become our home for the next 5 months as we traveled around the USA and moved to Vancouver.
This post has been a long time coming and I’ve finally got down to writing about how we went from a van full of metal shelving into a home in 2 weeks.
Converting a van into a campervan isn’t such a novel thing anymore.
Everyone’s doing it.
The chances are you know someone who is or has learnt how to turn van into home.
Converting a van in 2 weeks at -20C in a parking lot? Well, that’s a bit different. And yes, it may not have been the wisest move but that’s exactly what we did.
Our DIY campervan conversion in 2 weeks


Buying our van

We’d moved from the UK to Canada and landed in Toronto to activate our IEC (working holiday visas) for Canada.
We spent the first few weeks exploring Toronto, Montreal, Ottawa, and Quebec City before returning back to Toronto and searching for a van.
We were doing a house sit in Toronto for a week and had a few nights’ accommodations after that booked in. That meant we had a week to find a van and make a start on converting it, ideally at least enough so that we wouldn’t have to book more accommodation.
We trawled Craigslist and Kijiji in the Toronto area and saw quite a few vans and campervans. There was a larger motorhome that I loved but I know it wouldn’t have really been practical, and plenty of vans that were just rust buckets including one with a literal hole in the bottom of it. Eventually, Thom found a white Ford Econoline E150 van and, after some negotiating, he was ours!
There were a few things we were considering before we bought our van and you can read more about those here.
The first few days
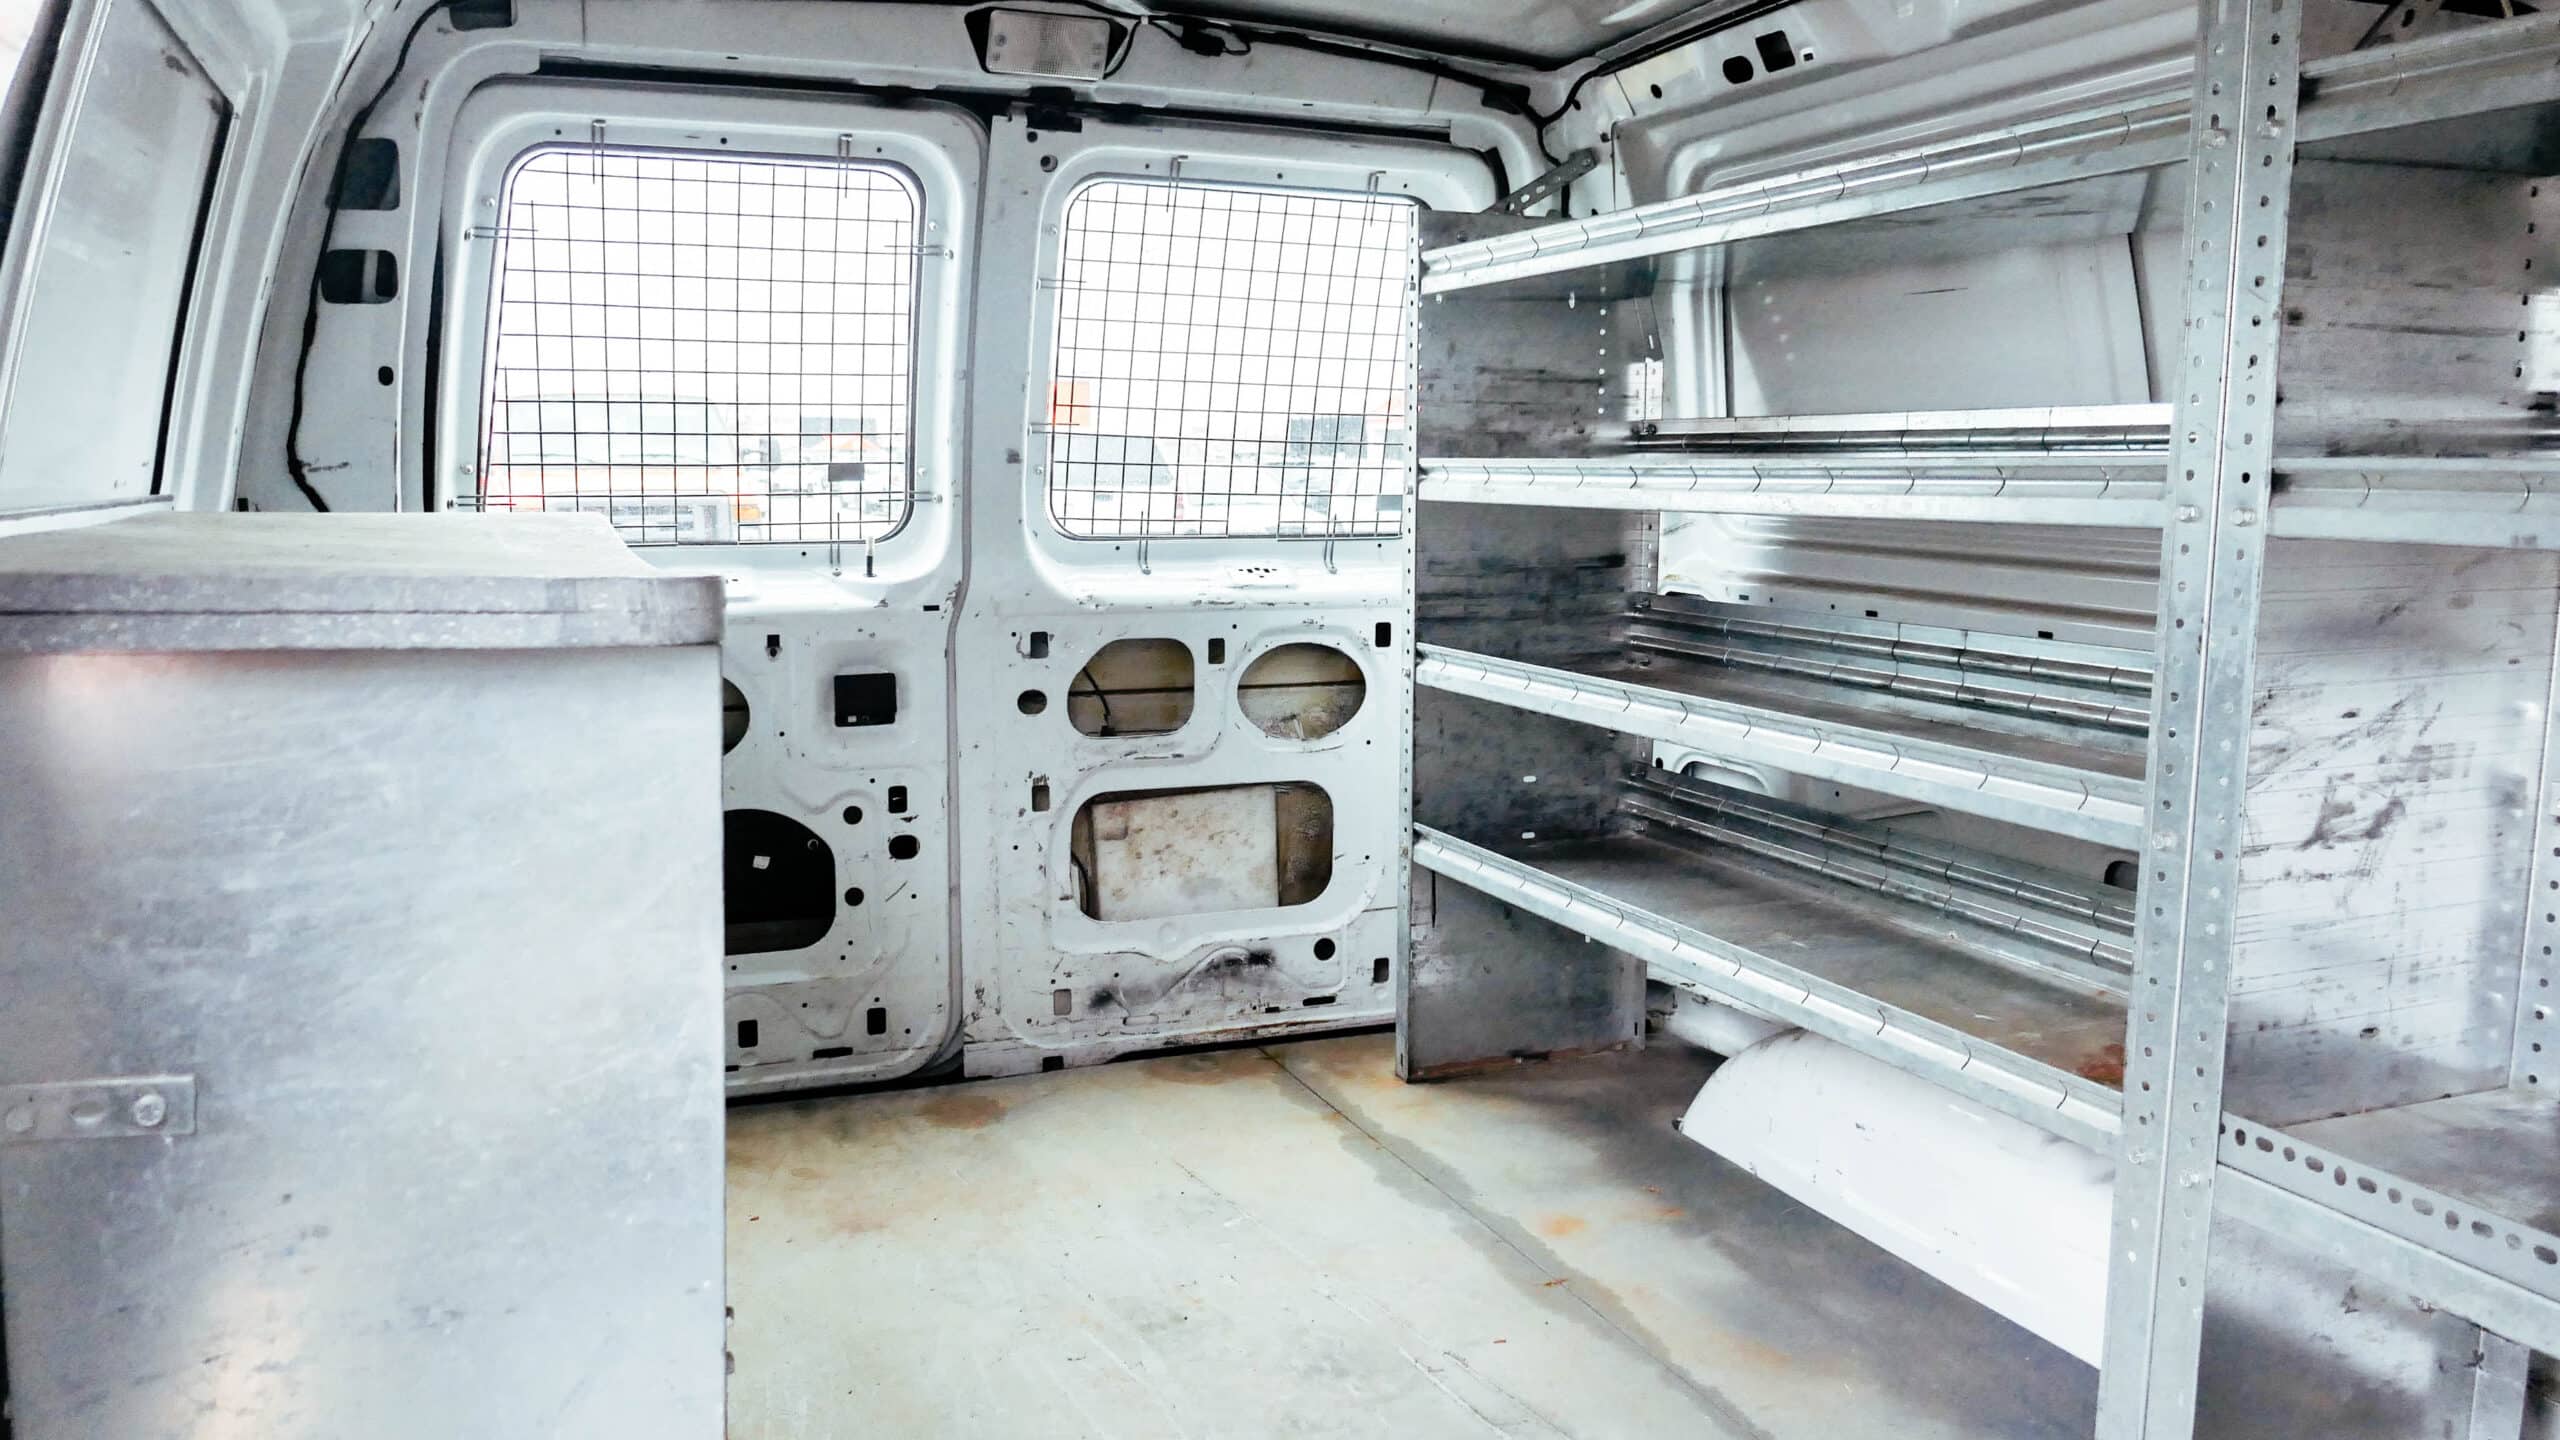
The first few steps were to remove the interior shelving and clean the van up a little.
We’d finished the house sit by the time we got the keys to Elvis and were staying in a cheap Airbnb.
We’d drive out to a shopping area on the outskirts of Toronto where there was a Home Depot and a Rona and get to work.
This was one of the best places for us to be since we were in walking distance of the stores and could get the various tools we required.
We didn’t have any tools with us previously so everything we needed for the van we’d have to buy and store in the van.
In the end, the only electrical tools we bought were a drill and a jigsaw. We also made sure they were battery-powered tools and when one battery ran out, the staff in Home Depot kindly charged the other for us.
But before the tools, we worked on unscrewing and using a hand saw to get the rusted bolts off that were holding the shelving and the divider between the seats and the back out.
This was probably one of the hardest tasks of the whole van conversion.
When they were finally out we were able to give Elvis a good clean down.
Fitting insulation in the van

Next up was insulation for our campervan conversion.
We’d read a lot about the best way to go about this and quickly came to learn that no one really knows.
In fact, it’s even questionable whether it makes a difference at all.
In the end, we decided to try a few methods since we were traveling in winter (at least for the first month), and planned to use the van for ski trips in the future. We thought it’d be better than nothing!
For our insulation, we used a combination of foam boards, foam spray, and some fiberglass (double-wrapped in bags to make sure it didn’t come out).
The first step in the instructions for foam spray is to use it in a warm area.
That wasn’t an option for us.
We had no garage we could heat, and Toronto in February that year was around a steady -15C to -20C. Not exactly warm.
Since we had no choice we used it anyway and then when we arrived in Florida, we discovered spray foam expands more in the heat to the point that the lock on the door got jammed and we had to chip away at some of the foam to release it.
Getting the insulation was one of the more expensive parts of the van conversion project and there’s a lot of fuss.
But with two of us working together to measure, cut, stick and spray we got the whole van (ceiling, walls, door panels and floor) insulation in a couple of days.
I remember this also involved a lot of me running up to the subway inside Rona to get us some lunch, and more than a few trips to Chipotle for quick, easy dinners.
Adding the walls, floor and ceiling

Next up was adding the walls, floor, and ceiling to make the van look a bit more homely. As pretty as wooden cladding and panelling look, it’s expensive, takes a lot of time and tools, and is pretty heavy.
In the end, we decided to go with plywood panels that required minimal cutting and sawing and screwing.
The panels have quite a bit of flex to them so we could just screw them and it would bend enough to fit the shape of the van.
We used the same material on the ceiling and the floor. We got a little fancier with the area of the floor we’d see the most often and added some vinyl flooring (in a dark color to show less dirt).
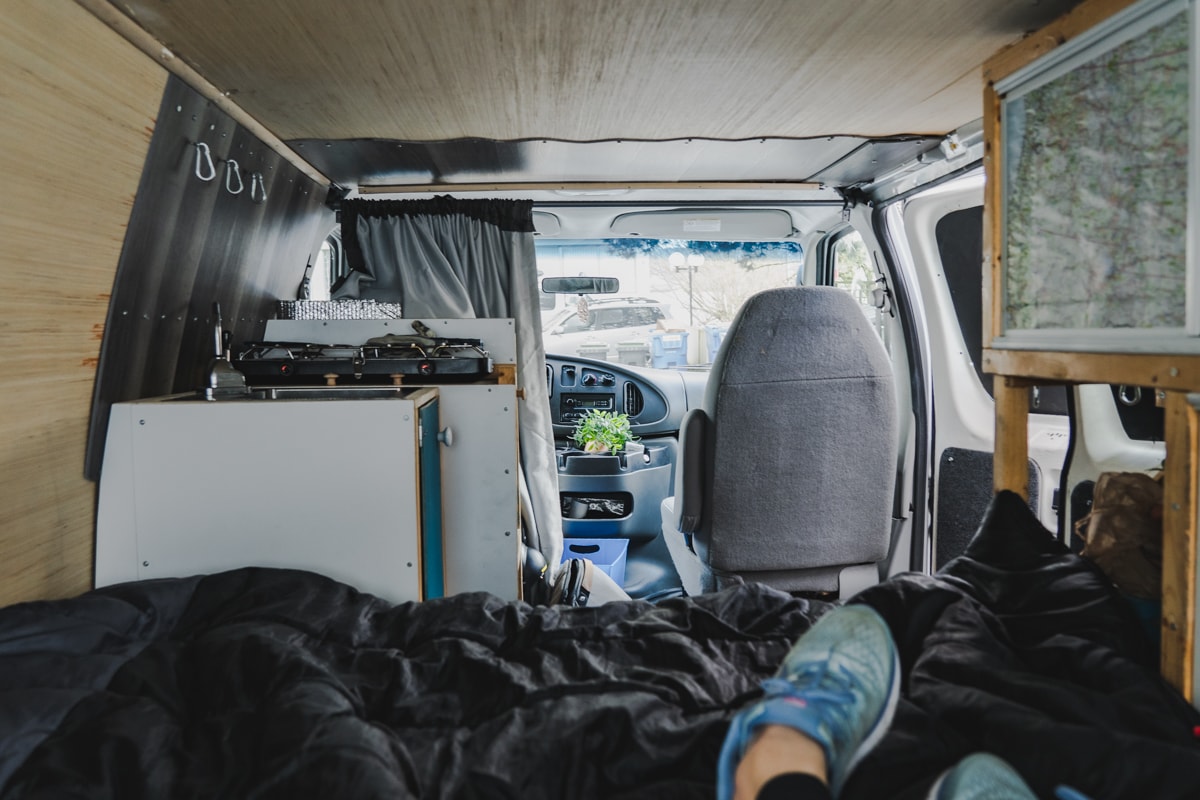
Making the bed and seating

I can’t take credit for our bed/seating area.
I told my husband what I wanted and he built it for me.
It took a lot of measuring and planning (I have a notebook with all that written down still!) but it resulted in a great L-shaped bed/seating area with a part that pulls to extend it to a full-size double bed.
It was important to us to have a full-size bed that we could lay down on comfortably and also be able to sit up in bed without bashing our heads whilst still being able to store things underneath it.
We actually managed to achieve all of this, although we rarely bothered to push the extendable back in and out!
Moving into the van
With that done we spent an evening in Ikea getting a mattress, some bedding (the warmest we could find), and a couple of kitchen essentials to go with the camp stove we’d bought. And, with that, we were ready to move in!
I won’t lie, the first night in our van I found it pretty scary.
I was convinced someone was going to try and break in and strategically placed a knife closeby (don’t exactly know what I was planning on doing…).
But everything was fine, and it has been every other night we’ve slept in the van. In fact, the best night’s sleep I get is when we’re camping in Elvis!
Extra touches over the next few months

Of course, we had a few things we added to the van at a later date.
We built some shelving alongside the bed when we were in Texas, added a solar panel in New York State, built a small kitchen area with a sink and hand pump tap, and the all-important fairy lights too.
Read these tips for making your van feel more like a home!
Final thoughts on our little van turned into a home
Is our van the prettiest van conversion out there? No.
But it has everything we need, didn’t cost us an absolute fortune, and makes a great little home.
It’s definitely possible to convert a van yourself in a short amount of time.
Don’t let Instagram and the #vanlife make you think you’ve got to hire a professional and spend months on converting it.
At the end of the day, you bought the van so you could get outside and explore, not for it to sit in a parking space for 6+ months doing nothing.
Last Updated on September 21, 2023 by Hannah

Hannah started That Adventurer after graduating back in 2013 and has documented all of her adventures since then. From backpacking South America to city breaks in Europe, a 3 month road trip across the USA in a self-converted van and 6 years living in Canada, you’ll find posts on all of this.
Hannah specialises in active travel and on That Adventurer you’ll find hiking, walking, biking, skiing and all sorts of active travel guides to allow you to see a destination in an adventurous way.
Now back in Europe, you’ll find new guides as Hannah and her husband spend the next year ‘digital nomading’ from Norway to Portugal, Switzerland to Scotland and places in between.


